Walk‑in Shower Ideas and How to Install Them
Thinking about swapping a cramped tub for a spacious walk‑in shower? You’re not alone. Homeowners love the open feel, easy access, and modern look a walk‑in shower gives a bathroom. Below are the basics you need to get started, from planning the layout to picking the right tiles and fixtures.
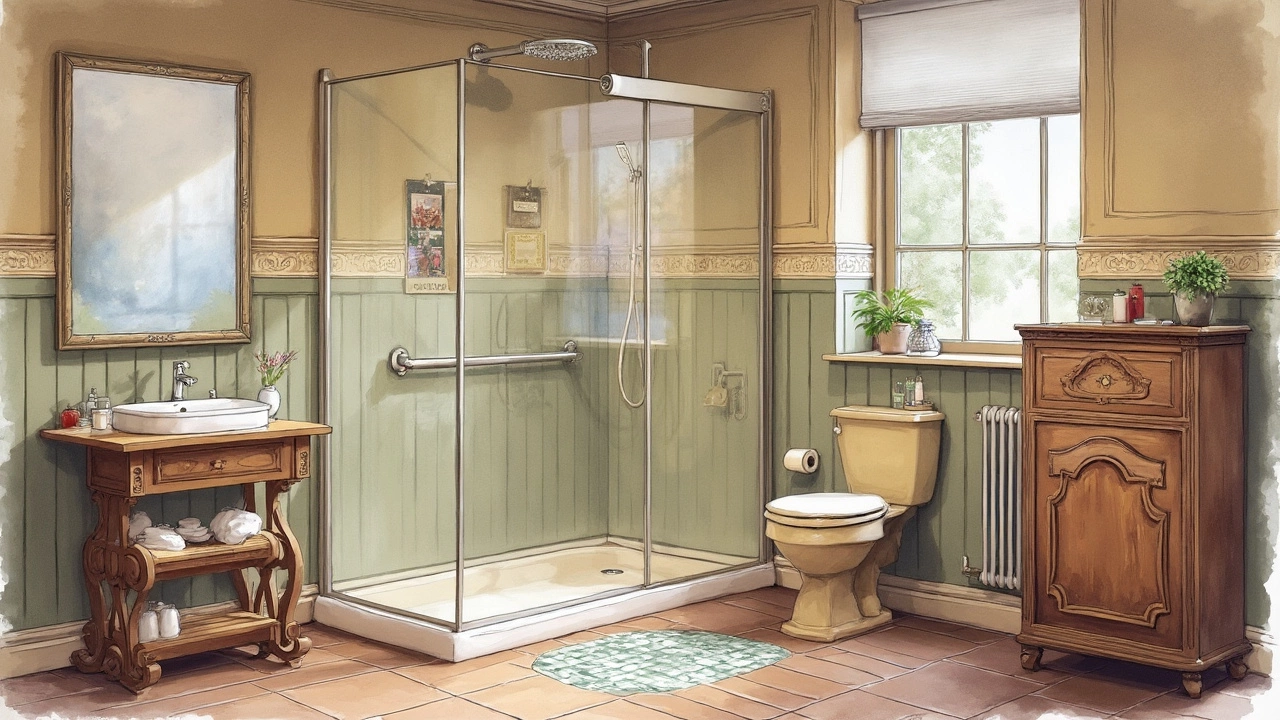
Plan Your Space and Layout
The first step is measuring the area where the shower will sit. A comfortable walk‑in shower needs at least 30‑inch width, but 36‑inch or wider feels luxuriously roomy. Sketch a simple floor plan: note where the door (or curtain) will go, where the drain sits, and how much room you’ll have for benches or niches.
For a barrier‑free experience, many people choose a low‑step entry or a curbless design. A curbless floor slopes gently (about 2%‑3%) toward the drain, which keeps water from spilling out. If you’re not ready for a full curbless build, a small threshold works fine and still feels open.
Select Tiles, Fixtures, and Features
Tile choice can make or break the look. Large‑format porcelain or natural stone tiles reduce grout lines and give a sleek feel. If you love texture, mix a smooth floor tile with a patterned wall tile for a focal point. Remember to use slip‑resistant flooring for safety.
Showerheads matter too. A handheld shower adds flexibility, especially for kids or pets. For a spa vibe, install a rain‑style head on the ceiling. Combine both for a custom experience. Don’t forget a built‑in niche to store shampoo and soap—no more cluttered shelves.
Lighting can brighten the space and highlight tile patterns. LED strips placed behind a recessed niche or under a glass partition add a soft glow without heating the bathroom.
When you pick a drain, look for a linear drain if you have a curbless floor. It lets water flow along the length of the shower, which works well with rectangular tiles.
Finally, think about water‑tightness. Use a high‑quality waterproof membrane under every tile and seal all edges with silicone. Cutting corners here leads to leaks later.
Once you have the design, get a professional plumber to run the necessary pipes. In most cases, you’ll need a new mixing valve to control temperature and flow. If you’re handy, you can handle the tiling yourself, but the plumbing should be left to a licensed tradesperson.
After installation, let the mortar and grout cure for at least 24‑48 hours before using the shower. Run water slowly at first to check for any leaks around the drain and fixtures.
With these steps, you can turn a boring bathroom corner into a stylish walk‑in shower that adds value and daily comfort. Ready to start? Grab a tape measure, sketch a layout, and explore tile samples. Your new shower is just a few decisions away.
Exploring whether Medicare covers walk-in showers can help many seniors and those with mobility issues. This article unpacks the specifics of how Medicare parts, like Part B and Advantage Plans, contribute to home modifications. It also highlights tips on navigating potential financial support and how to effectively request claims for such installations. Walking through the alternatives and community resources adds value to those seeking accessible bathroom solutions.
Mar, 10 2025